
Getting Started: Your First Image Conversion
Converting your first image to SVG is easy! This beginner-friendly guide walks you through uploading an image, detecting colors automatically, and downloading your layered SVG file ready for Cricut or other cutting machines.
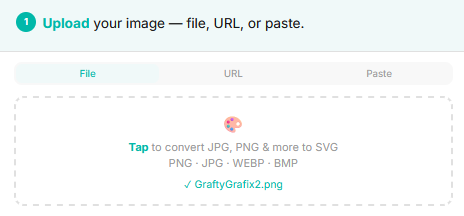
1Upload Your Image
Start by going to the CraftyGrafix converter page and uploading your image. You can:
- Drag and drop an image directly onto the upload area
- Click to browse your computer for a JPG or PNG file
- Paste an image directly into the upload area
- Enter a URL to an image online
For best results, choose a high-quality image with clear colors and good contrast. The higher the image quality, the better your SVG conversion will be.
2Let AI Detect Your Colors
By default, CraftyGrafix uses AI Detection to automatically identify the colors in your image. After your image is uploaded, the system analyzes your image and detects the dominant colors. You'll see a "Detecting colors..." animation while the system works. This usually takes just a few seconds.
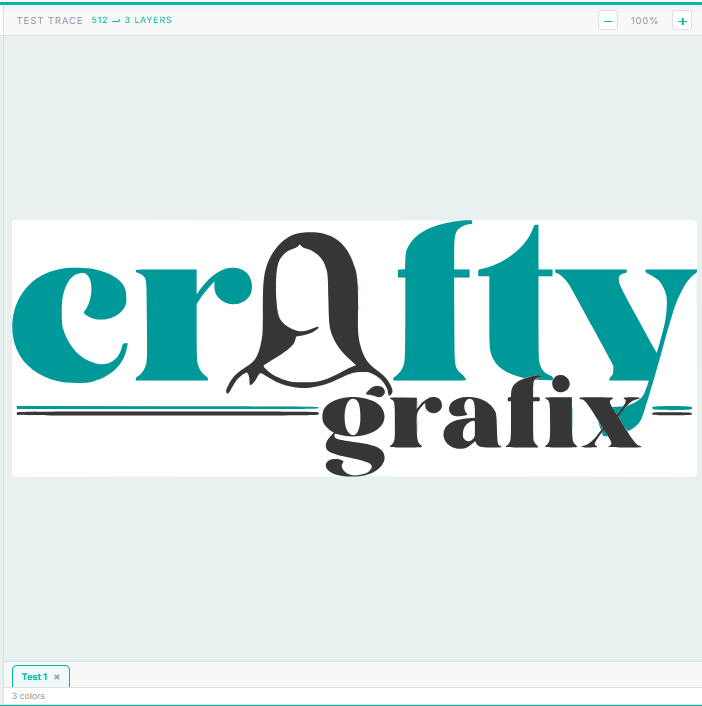
3Review Your Trace Preview
Once color detection is complete, you'll see a preview of your traced design. This shows you how your final SVG will look with the colors CraftyGrafix detected.
If you're happy with the result, you're ready to download! If you'd like to adjust the colors, continue to Step 4.
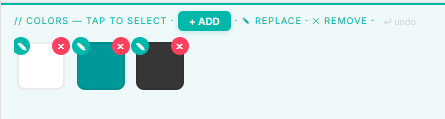
4Adjust Colors (Optional)
If the automatic color detection didn't quite match your vision, you can easily adjust the colors before downloading:
- Add colors: Click the "+ ADD" button and then on the uploaded image to add more colors or shades to your palette
- Remove colors: Click the red "X" button to remove colors you don't need
- Update colors: Click on the green eye dropper icon on a color swatch to change the color and then on the uploaded image to change it to that color
This is especially important if you want to capture different shades of the same color (for example, light green, medium green, and dark green). Including multiple shades creates more dimension and detail in your design.
5Try Manual Mode (Advanced)
Once you're comfortable with AI Detection, you can try Manual Color Selection for more control. In manual mode, you choose every color in your design manually instead of using automatic detection.
This is helpful when you want precise control over which colors to include. To switch to manual mode, select it from the color selection options on the main page.

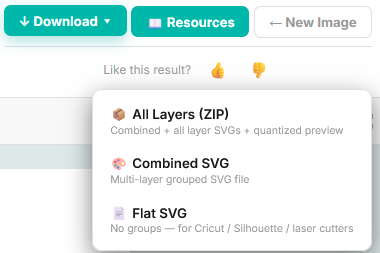
6Download Your SVG
When you're happy with your design, click the Download button to see your options:
- Combined SVG (Recommended for Cricut): A single multi-layer SVG file with all colors grouped together. This is the easiest to use in Cricut Design Space.
- Flat SVG: All layers flattened into one file with no groups. Great for laser cutters and some other machines.
- All Layers (ZIP): A complete package including the combined SVG, individual layer SVGs, and a preview image.
What's Next?
Now that you've created your first SVG, you're ready to use it in Cricut Design Space! Check out our detailed guide:
Pro Tips for Best Results
- Quality matters: Higher resolution images produce cleaner, more detailed SVGs
- Colors are key: Include multiple shades if they're important to your design. Don't skip subtle color variations!
- Start simple: Begin with simple designs to learn how the tool works, then move to more complex images
- Good contrast: Images with good contrast between colors convert better than flat, low-contrast images
- Experiment: Try both AI Detection and Manual mode to see which works best for your images
- Share your feedback: After downloading your SVG, let us know what you think by clicking the thumbs up or down button on the results page. Your feedback helps us continue to improve CraftyGrafix!
Need Help?
If you have questions about converting your image or using CraftyGrafix, we're here to help:
Email: crafty.grafix.help@gmail.com